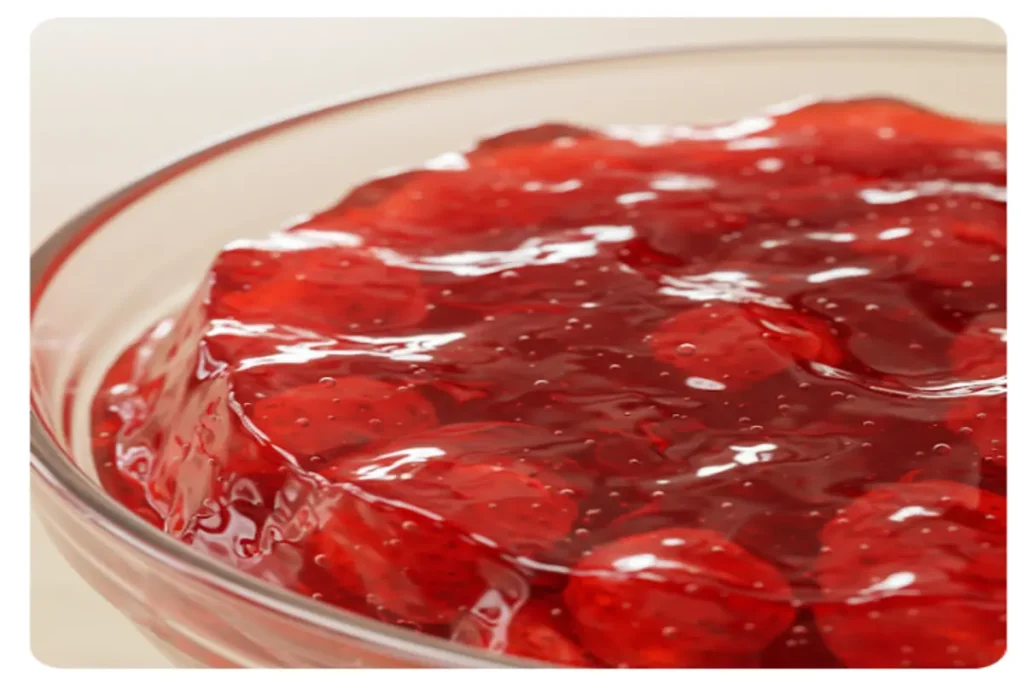
Who doesn’t love the taste of fresh, homemade strawberry jelly? Spreading it on a warm paratha or topping it on a bowl of yogurt – yum! But instead of buying expensive jars from the store, why not make your own at home? It’s super easy, and we promise it will taste so much better! You don’t need to be a master chef to pull this off, just some fresh strawberries, sugar, and a little bit of magic (okay, maybe some pectin too).
So, let’s get started on this fruity adventure and bring the taste of summer to your kitchen!
What Are the Ingredients in Strawberry Jelly?
- Fresh strawberries
- Sugar
- Lemon juice
- Pectin
Equipment Needed
- Medium saucepan
- Potato masher or fork
- Wooden spoon
- Measuring cups and spoons
- Sterilized jars and lids
- Chilled plate (for testing consistency)

Spread The Sweetness With Every Strawberry-Packed Bite
Step-by-Step Instructions
Making a homemade strawberry jelly recipe is a fun and easy process that anyone can enjoy. In this section, we’ll guide you through simple steps to create a delicious, homemade treat. With fresh strawberries and a few basic ingredients, you’ll be spreading sweet, homemade jelly in no time!
Step 1: Prepare the Strawberries
Start by washing your fresh strawberries thoroughly under cold water. Remove the green leaves and stems, and then cut them in half. Once they are clean, use a potato masher or a fork to mash the strawberries. You can mash them until you have a chunky consistency or mash them more if you prefer a smoother texture for your jelly. The more mashed, the less pulp you’ll have in the final jelly.
Step 2: Cook the Strawberry Mixture
After preparing the strawberries, place them in a medium saucepan. Add 2 cups of sugar and 1 tablespoon of lemon juice to the mashed strawberries. Stir the mixture well to ensure the sugar dissolves completely. Cook this over medium heat, stirring constantly. The sugar will start melting, and the strawberries will begin to release their juices. Keep stirring to prevent the mixture from burning.
Step 3: Add Pectin to the Mixture
Once the strawberry and sugar mixture is fully combined, it’s time to add the pectin. Pectin is an essential ingredient for making strawberry jam, as it helps it to set properly. You can use any type of fruit pectin, like Sure-Jell or another brand. Follow the instructions on the pectin package and sprinkle it into the simmering strawberry mixture. Stir well so the pectin dissolve evenly throughout the mixture.
Buy Delicious Jelly Custard from Rennee Foods – Treat Your Taste Buds!
Step 4: Boil the Strawberry Mixture
After adding the pectin, bring the strawberry mixture to a rolling boil. A rolling boil means that the mixture is bubbling vigorously and cannot be stirred down. Keep stirring the mixture to ensure it doesn’t stick to the bottom of the pan. Let it boil for 2-3 minutes while constantly stirring. This process helps to thicken the jelly. Don’t worry if it looks runny at this point – it will thicken once it cools down.
Step 5: Test the Jelly Consistency
Once your jelly has boiled for a few minutes, it’s time to test if it’s ready. Take a chilled plate (you can keep it in the freezer for a few minutes before testing) and drop a small spoonful of the jelly onto the plate. Let it sit for a minute, then gently run your finger through it. If the jelly wrinkles and holds its shape, it’s done. If it’s still runny, let it boil for another minute or two and test again.
Step 6: Prepare the Jars
While you’re boiling the jelly, it’s a good idea to prepare your jars. You can use glass jars or small containers with lids. Make sure the jars are sterilized by placing them in boiling water for a few minutes. This step helps prevent any bacteria or germs from contaminating your jelly. Once sterilized, carefully remove the jars and let them cool slightly. Be careful, as the jars will be hot.
Step 7: Fill the Jars with Jelly
Now that your strawberry jelly is ready, it’s time to fill the sterilized jars. Using a ladle or a measuring cup, carefully pour the hot jelly into the jars, leaving about ½ inch of space at the top. This gap is important for proper sealing. Be careful not to spill any jelly on the jar rims, as this could interfere with the sealing process. You can wipe the rims clean with a cloth if necessary.
Step 8: Seal the Jars
Once the jars are filled, it’s time to seal them. Place the sterilized lids on top of each jar and screw the bands on tightly. If you’re using the canning method, you can process the jars in a boiling water bath for about 5 minutes to ensure they seal properly. However, if you’re simply refrigerating the jelly, the lids should seal on their own as the jelly cools. You’ll hear a popping sound as the lids seal.
Turn Breakfast Into A Berry Delicious Delight
Step 9: Cool the Jelly
Allow the jars of jelly to cool at room temperature. As the jelly cools, it will begin to thicken and set. You’ll notice the lid of the jar will curve downward once the jar has sealed. This is an indication that your jelly is sealed properly. It usually takes a few hours for the jelly to cool completely, but you can leave it overnight to make sure it’s fully set before you start using it.
Step 10: Store and Enjoy Your Jelly
Once your homemade strawberry jelly has cooled and set, it’s ready for storage. If you want to keep it for a longer time, you can store the jars in the refrigerator. Homemade strawberry jam or jelly typically lasts for about 2-3 weeks in the fridge. If you want to store it for even longer, consider freezing the jelly in freezer-safe jars. Just make sure to leave enough space at the top of the jar for expansion. Enjoy your homemade jelly with toast, paratha, or even as a topping for desserts!
Pro Tips for Perfect Jelly
Making homemade strawberry jelly is easy, but there are a few tips and tricks that can help ensure your jelly turns out perfectly every time. Whether you want a smooth, spreadable consistency or a firmer set, these pro tips will guide you through the process.
Use Fresh, Ripe Strawberries
The quality of your jelly depends heavily on the quality of the strawberries you use. Always choose fresh, ripe strawberries for the best flavor. Overripe or under-ripe strawberries can affect both the taste and the setting process. Look for strawberries that are bright red, firm, and fragrant. Fresh strawberries will release more juice, which is essential for a flavorful jelly.
Don’t Overcook the Mixture
It’s easy to get caught up in the excitement of making jelly and want to boil the mixture longer than necessary, but overcooking can cause the jelly to become too thick or even burn. Follow the recipe’s cooking time, and always test the jelly before deciding if it’s done. Remember that the jelly will continue to thicken as it cools.
Enjoy The Affordable And Classic Taste Of Fresh Strawberries
Use the Right Amount of Pectin
Pectin is the key ingredient in helping the jelly set. Too much pectin can cause your jelly to become too firm, while too little can result in a runny texture. Always follow the instructions on the pectin package, and be sure you’re using the correct type for your fruit. For strawberry jelly, liquid or powdered pectin should work well. If you want a smoother jelly, you can use less pectin or cook it for a shorter time.
Test for the Right Consistency
A good way to check if your jelly has reached the right consistency is to use the “wrinkle test.” After boiling the mixture, place a spoonful of jelly on a chilled plate and let it cool for a minute. Run your finger through the jelly. If it wrinkles and holds its shape, your jelly is ready. If it’s still too runny, continue boiling for a minute or two and test again.
Don’t Stir Too Much Once the Jelly is Boiling
Once your mixture is at a rolling boil, try to avoid stirring too much. Stirring constantly can cause the jelly to foam, making it harder to achieve a clear and smooth finish. Let it boil for 2-3 minutes without stirring, and keep an eye on it to prevent burning.
Sterilize Your Jars Properly
Before filling your jars with jelly, make sure they are properly sterilized. Wash the jars and lids thoroughly, then place them in boiling water for 5-10 minutes. Sterilized jars help prevent bacteria from spoiling your jelly. If you plan to store jelly for long periods, using sterilized jars is essential.
Store Jelly Correctly
After making the jelly, let it cool to room temperature before sealing and refrigerating. Homemade strawberry jelly will last for 2-3 weeks in the fridge. If you want to store it longer, consider freezing it. Make sure to leave some space at the top of the jar for the jelly to expand when frozen.
Experiment with Flavors
While classic strawberry jelly is always a hit, feel free to experiment with other flavors or ingredients. For example, you can add a touch of vanilla or a sprinkle of cinnamon to create unique flavor profiles. A little lemon zest or a few fresh herbs, like mint, can also add an interesting twist to your homemade jelly.
How to Store Homemade Strawberry Jelly
Here’s how to store homemade strawberry jelly in simple pointers:
- Refrigeration: Store cooled jelly in sterilized jars and seal tightly with lids. Keep in the fridge for 2-3 weeks.
- Freezing: Use freezer-safe jars, leaving ½ inch space at the top. Freeze for up to 6 months.
- Canning Method: If using the canning method, ensure jars are sealed properly. Store in a cool, dark place for long-term storage.
- Thawing: To thaw frozen jelly, place it in the fridge overnight before using.
- Shelf Life: Homemade jelly can last 2-3 weeks in the fridge, 6 months in the freezer.
Delight Your Toast With Fruity Strawberry Magic
Where To Find The Best Jelly In Pakistan?
If you’re looking for the best jelly in Pakistan, look no further than Renne Foods! Known for its top-quality, delicious jams and jellies, Renne Foods uses fresh, natural ingredients to create flavors that stand out. Whether you’re craving classic strawberry, mixed fruit, or something more exotic, Renne Foods offers a wide variety of mouth-watering options that are perfect for breakfast, desserts, or as a snack.
Renne Foods’ jellies are made with the perfect balance of sweetness and fruitiness, providing you with a delightful experience in every bite. They’re not only tasty but also packed in hygienic, easy-to-use jars, ensuring your jelly stays fresh for longer. Plus, Renne Foods is available in stores across Pakistan, so you can easily find your favorite jelly whenever you need it!
So, why settle for less when you can enjoy the best? Grab a jar of Renne Foods Jelly today and add some sweetness to your day!
In a Nutshell
Making homemade strawberry jelly is a fun and rewarding experience that brings the sweet taste of fresh strawberries right into your kitchen. With just a few simple ingredients and easy steps, you can create a delicious treat that’s perfect for spreading on toast or topping your favorite desserts.
So, gather your ingredients, follow the steps, and enjoy the homemade goodness. Whether for yourself or as a gift, your homemade strawberry jelly will surely be a hit! Happy jamming!